How to configure credits
Configuring and managing credits allows you to assign funds to parent accounts, which they can use for future meal orders. This guide will walk you through setting the credit expiration date, assigning credits to accounts, and viewing your change history, ensuring your credit programs are managed effectively.
Log into the Menu Manager
Go to the Menu Manager.
Enter your credentials and login.

Set credit expiration date
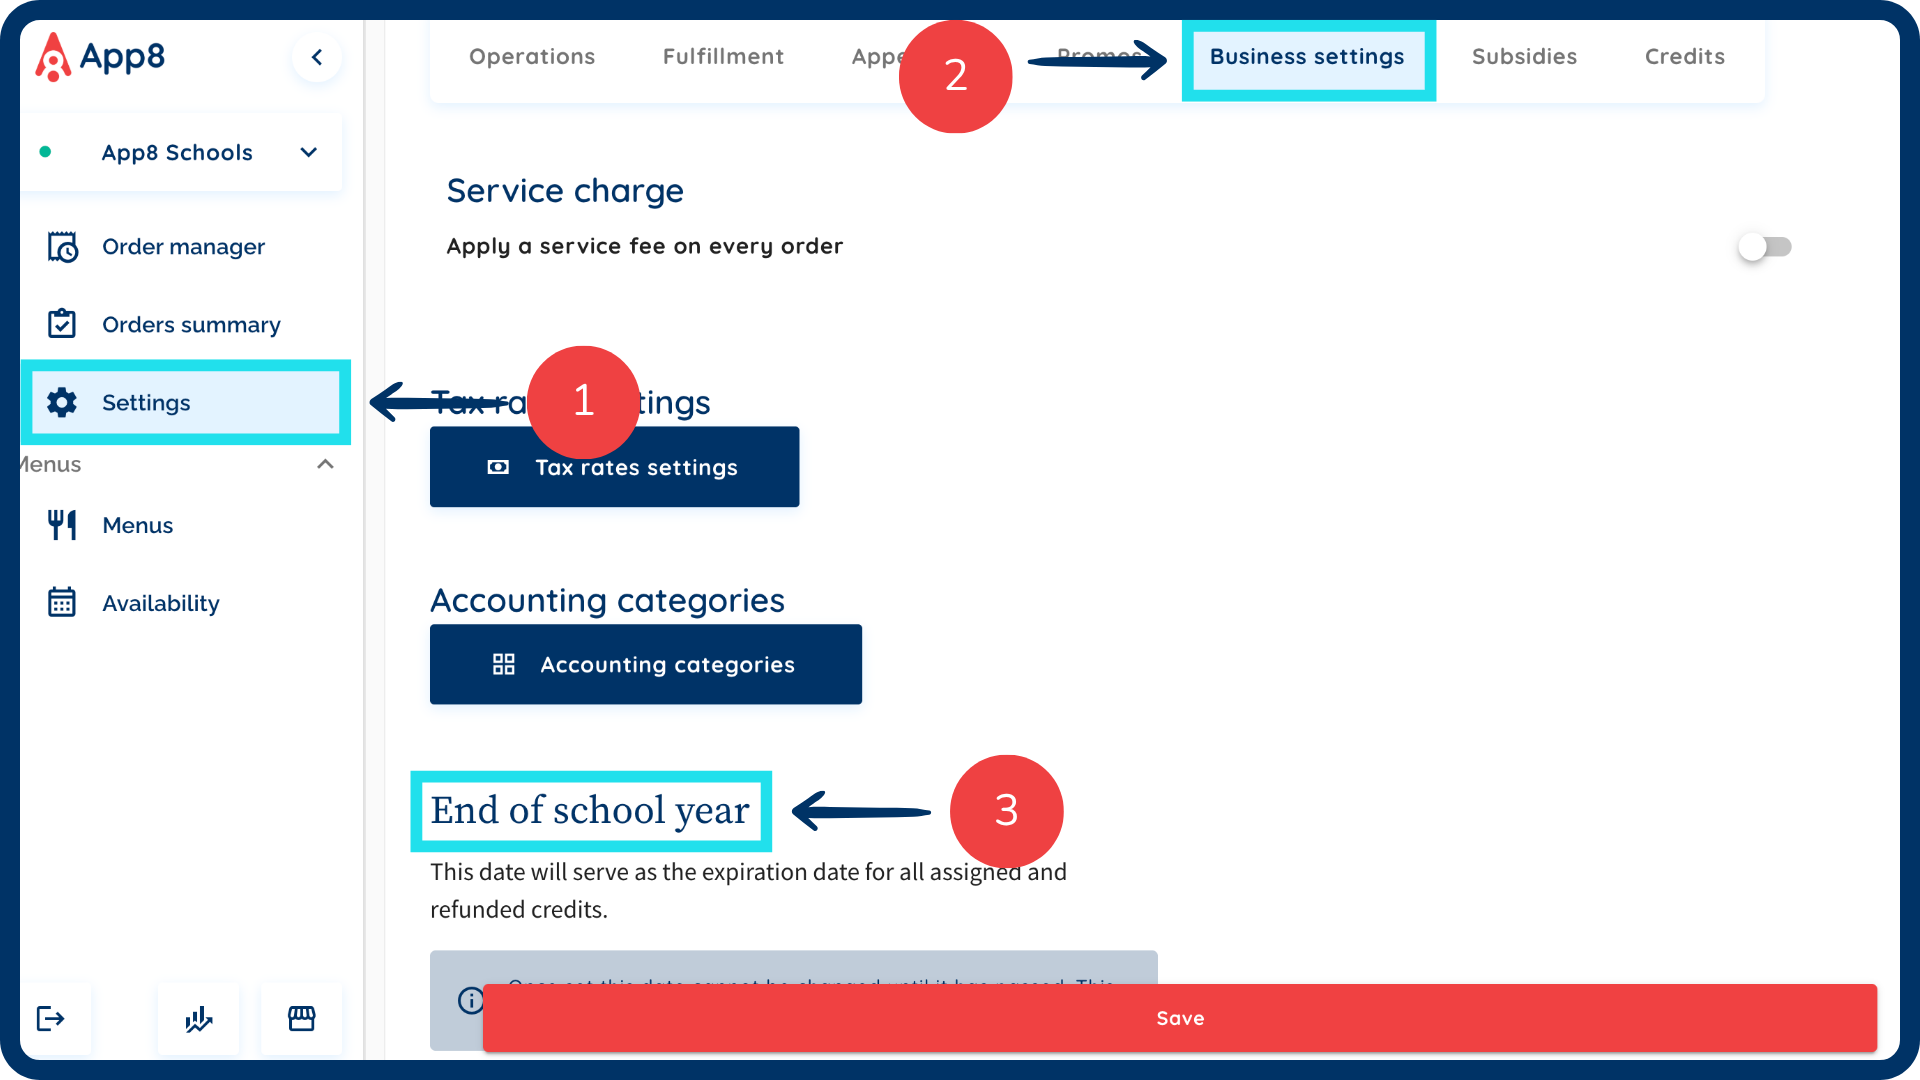
Navigate to the "Settings" page from the left sidebar.
Select the "Business setting" tab and scroll down to the "End of school year" section.
Select the date associated with the end of the school year. This date will serve as the expiration date for all assigned and refunded credits.
Important note: Once this date is set, it cannot be changed until it has passed.
Access credits
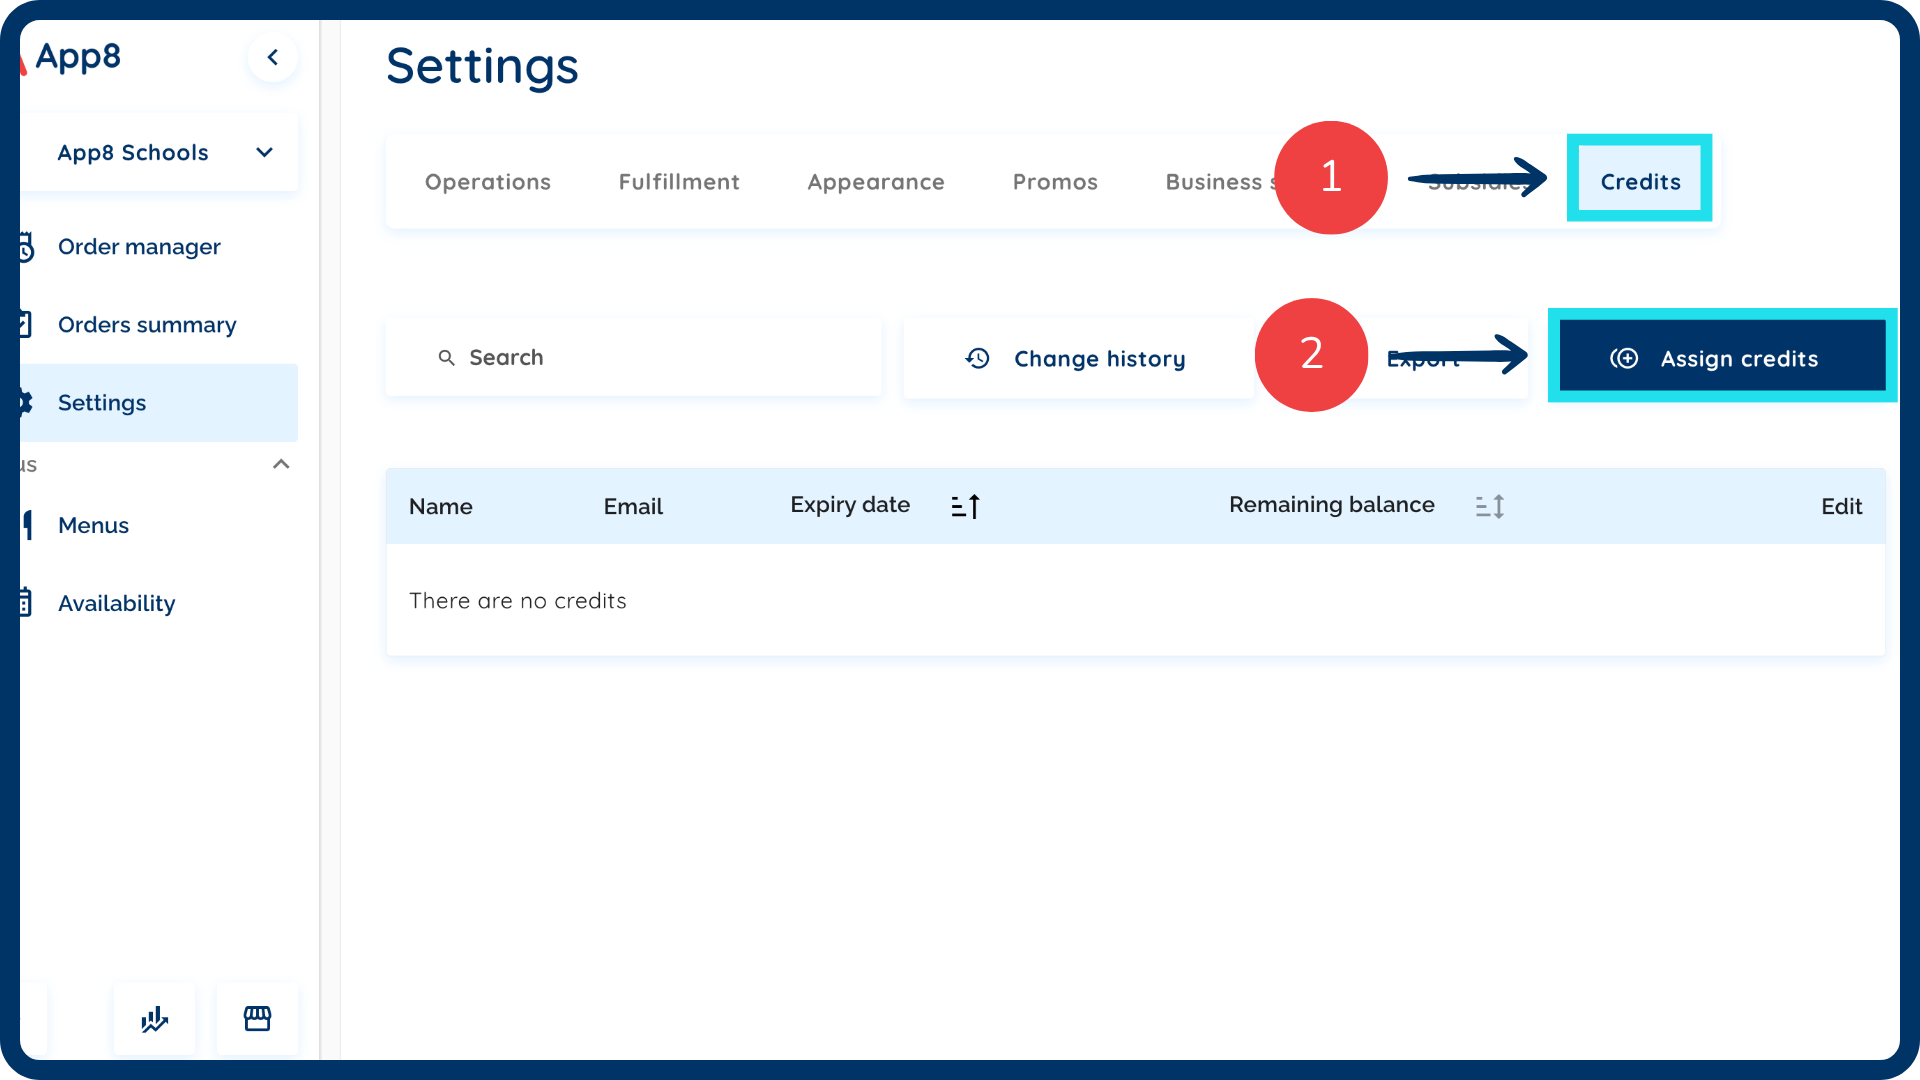
Select the "Credits" tab.
Click the "Assign credits" button.
Assign credits
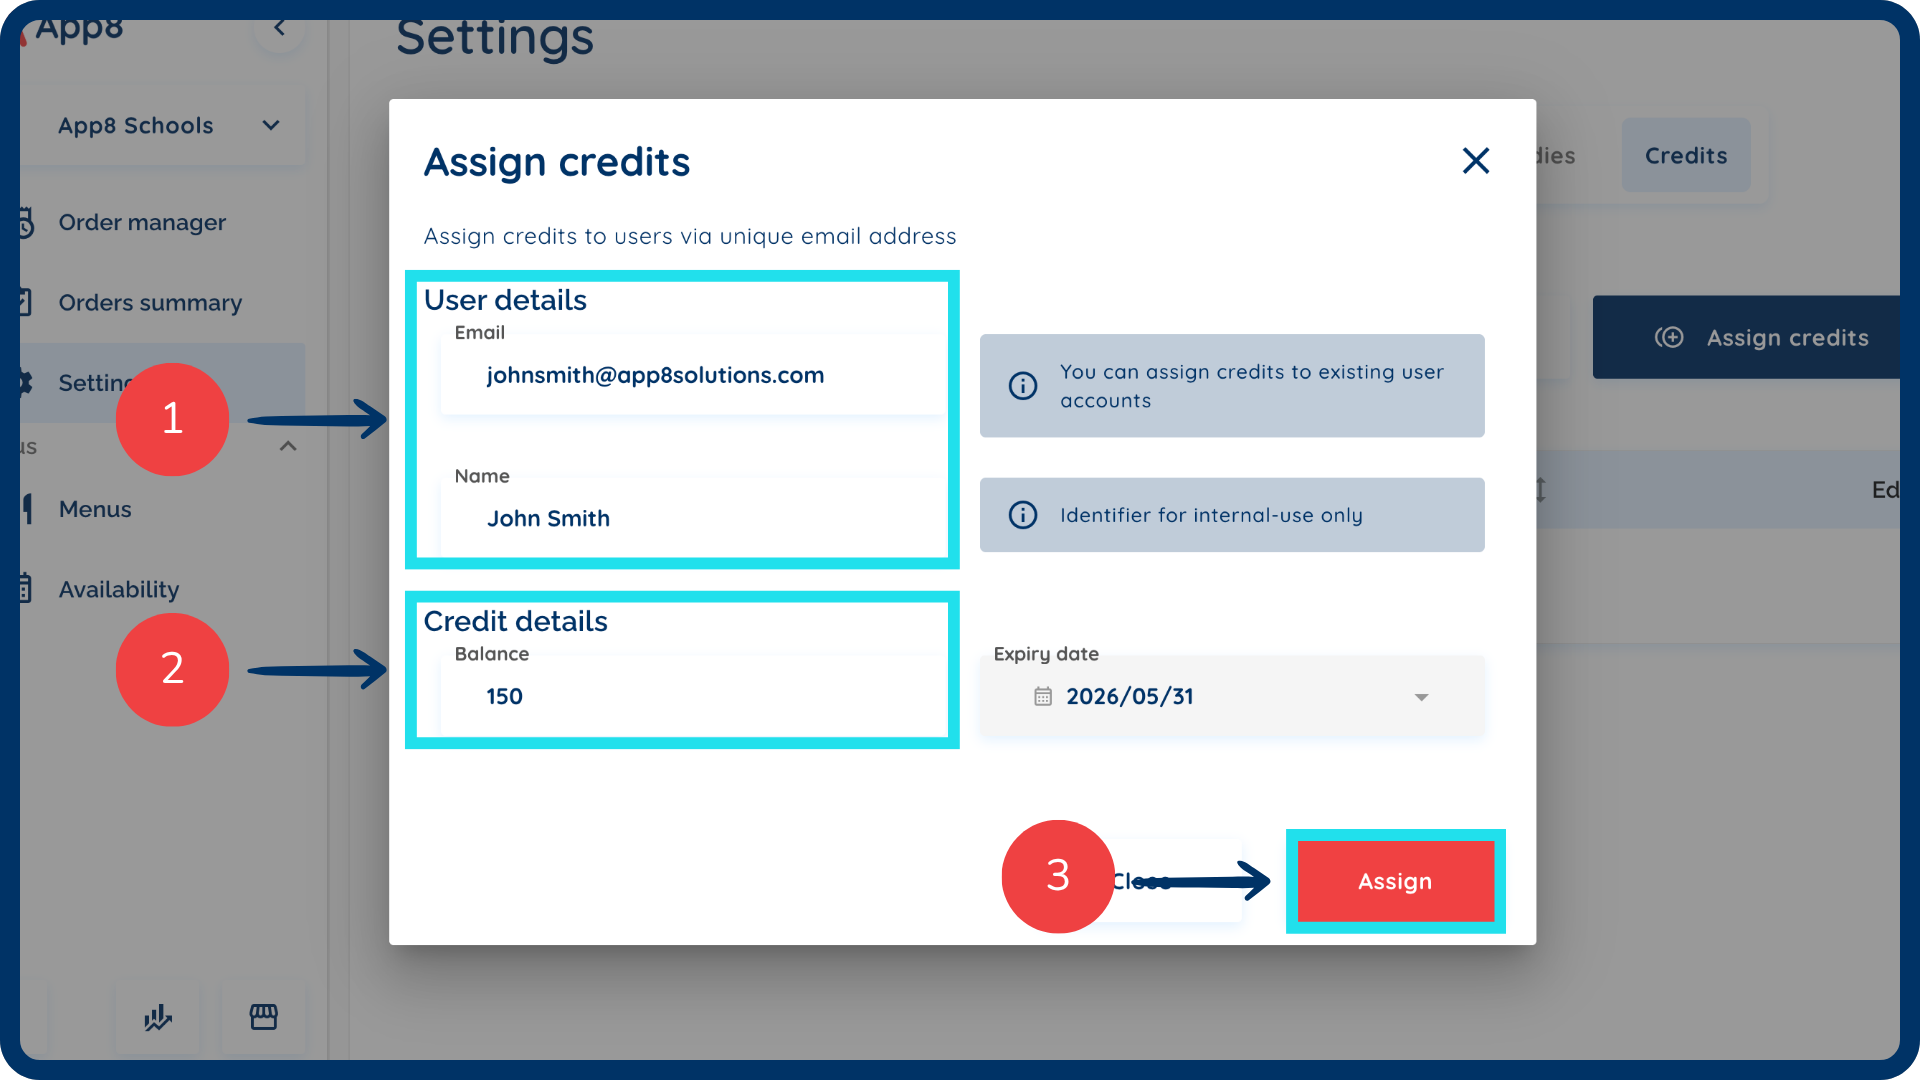
Enter the parent's email address and name.
Input the amount of credits to be assigned to their account.
Click the "Assign" button to save the credits.
Export credit information & view history
To access all accounts with assigned credits, click the "Export" button. The report will download to your device as a CSV file.
To view a history of all credit changes, click the "Change history" button.
Select the desired date range and click "Export" to download the history.

Was this article helpful?
That’s Great!
Thank you for your feedback
Sorry! We couldn't be helpful
Thank you for your feedback
Feedback sent
We appreciate your effort and will try to fix the article