Creating an item
Adding menu items is essential to keeping your offerings up to date and appealing to customers. This guide will walk you through the process of creating new items, setting prices, and customizing details to ensure a smooth ordering experience for your guests.
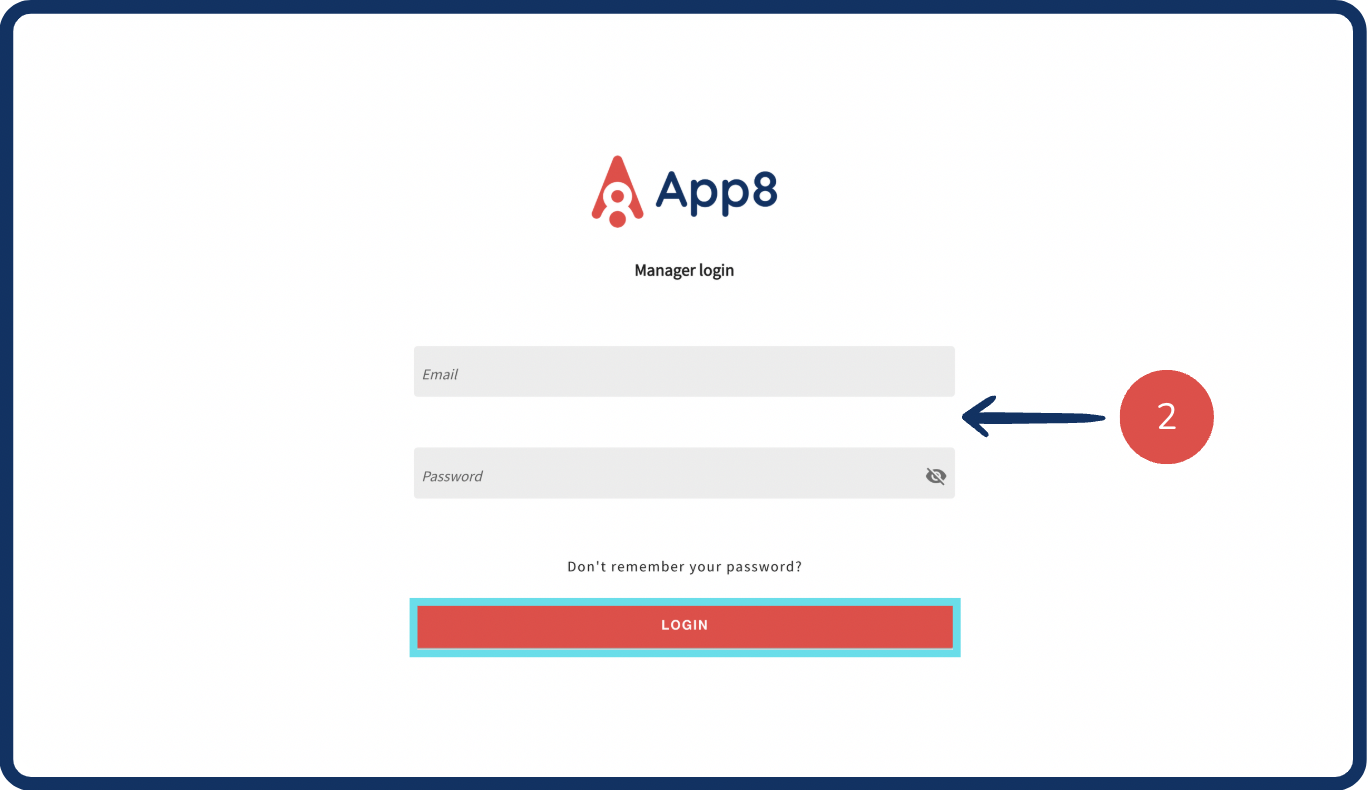
Log into the Menu Manager
Go to the Menu Manager.
Enter your credentials and login.
Create a new item
Select "Menus" from the left sidebar.
Click on the menu and section in which you want to add an item.
Select the "Create item" button.
Enter an item name and upload an image.

Set pricing & size options
Enter the item price and the non-subsidized price.
Enter the default price name (If price options are disabled, leave price name unchanged).
Enable the "Price options" button if your item is not subsidies and has multiple size formats (e.g., Small, Medium, Large).
Click the "+" button to add additional size options.

Specify item details (optional)
Enter the nutrition information by inputting the appropriate HTTPS URL.
Select applicable allergens and diets categories.

Add item description
Add a description and customize the look using our formatting tools (Bold, Italic).

Assign modifiers & save
Select or create a modifier for the item.
Click on the arrow to see the options associated with the modifier.
Click "Save Draft".

Was this article helpful?
That’s Great!
Thank you for your feedback
Sorry! We couldn't be helpful
Thank you for your feedback
Feedback sent
We appreciate your effort and will try to fix the article